Wet Basement After Rain: Do You Need Drainage Work or Waterproofing?
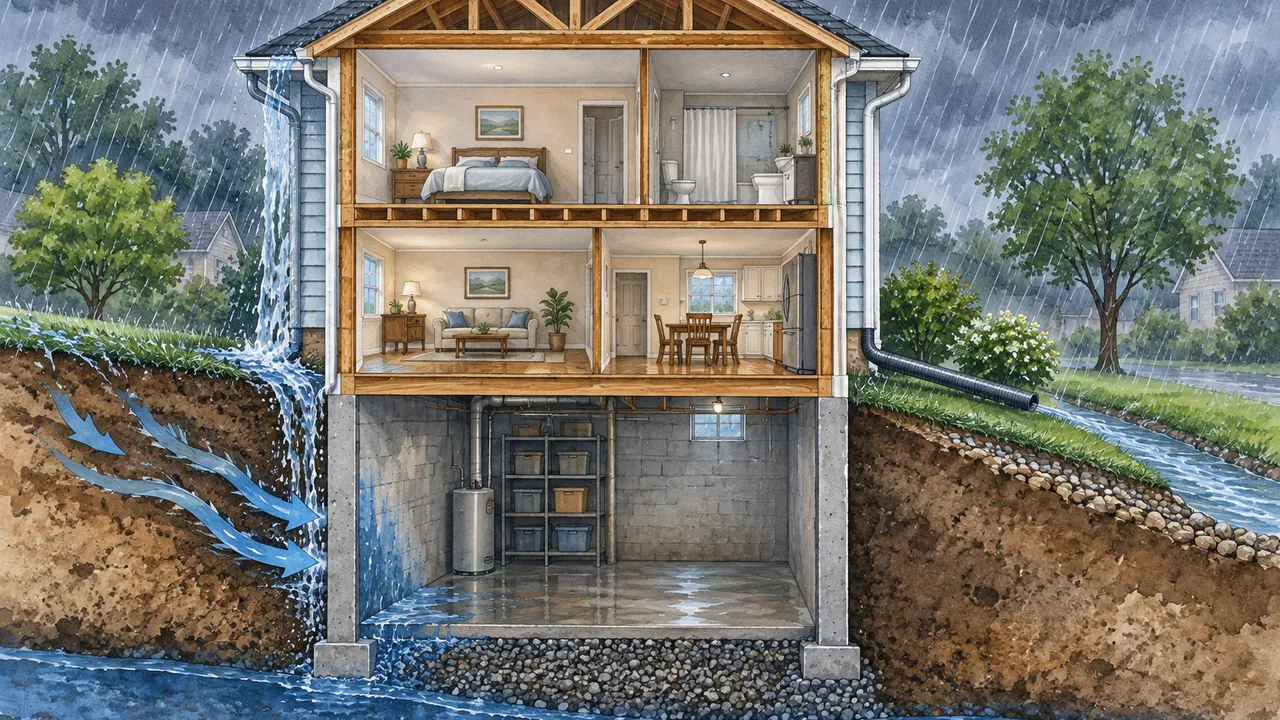
A basement that gets wet after rain does not automatically need an expensive waterproofing system. The problem may start with an overflowing gutter, soil that slopes toward the house or a downspout emptying beside the foundation. It may also involve rising groundwater, a leaking foundation joint or humid air condensing on cool surfaces.
The right repair depends on where the moisture originates and how it enters. Drainage redirects or collects water; waterproofing resists its passage through the foundation. Some homes need both. Before accepting a proposal, document what happens during storms and ask contractors to connect each recommended repair to an observed source. This record also provides a baseline for judging whether completed work actually solves the problem.
1. Identify the moisture before choosing the treatment
Check the basement during rain only if access is safe, then photograph wet spots afterward. Note whether moisture starts beneath a window, follows a crack or appears along the floor-wall joint. Timing provides clues, not proof: immediate leakage often follows runoff, while delayed seepage can reflect groundwater accumulating around or beneath the foundation.
Condensation can worsen during rainy, humid weather without rainwater penetrating the building. A humidity meter helps establish the pattern; the Environmental Protection Agency recommends keeping indoor relative humidity below 60%, ideally 30%–50%. Persistent dampness deserves investigation even without puddles. Hidden plumbing leaks are another possibility when moisture continues through dry weather.
Record storm duration and preceding rainfall alongside photographs. Leakage after several wet days may indicate saturated soil, even when the latest shower seems minor.
- Runoff clues: overflowing gutters, foundation-side puddles and wet window wells.
- Groundwater clues: delayed seepage through floor cracks or perimeter joints.
- Condensation clues: droplets on cold pipes, walls or floors during humid weather.
2. Fix roof runoff and grading first
Inspect gutters for debris, sagging sections and leaking joints. During a storm, observe them from the ground rather than climbing a ladder. Downspouts should discharge well away from the foundation to a location that actually drains, not into a low spot where water can return underground or flood a neighbor’s property.
Soil should generally fall away from the house. A common code benchmark is six inches over the first ten feet, but site constraints and local requirements vary. Do not bury siding, vents or termite inspection clearances with added soil. Tight lots may need a designed swale or drain instead.
Check paved patios and walks for settlement toward the foundation. Sealing an adjacent joint cannot correct a slab that continually directs runoff against the wall.
- Check buried downspout lines for blockage, collapse and disconnected fittings.
- Keep window wells clear; verify that any drain has a functioning outlet.
- Recheck during comparable storms before declaring a surface repair successful.
3. Understand what a sump system can solve
When groundwater pressure drives seepage through the slab or floor-wall joint, perimeter drainage connected to a sump may be appropriate. An interior system intercepts water and pumps it away; it does not make the exterior wall waterproof. A sump alone may miss water unless a drainage path delivers it to the basin.
Ask where collected water goes and how the system performs during a power outage. Discharge must follow local rules and avoid recirculating toward the house. Do not assume a sanitary sewer, street or neighboring property is an approved outlet. Capacity should match expected inflow and discharge height, not simply a pump’s advertised horsepower.
Test the system according to manufacturer instructions before rainy seasons. Adding water to the basin can verify automatic activation and actual discharge, not just motor operation.
| Component | What to verify |
|---|---|
| Perimeter drain | Collection area, cleanout access and connection to the sump. |
| Primary pump | Capacity at the actual discharge height and a working check valve. |
| Backup protection | Independent power or pumping capability, plus a high-water alarm. |
| Discharge line | Legal outlet, adequate drainage and protection against freezing. |
4. Reserve excavation for a defined problem
Exterior excavation can expose damaged foundation surfaces and allow installation of a waterproof membrane, drainage layer and footing drain. It may be justified when exterior materials have failed, leakage persists despite runoff corrections or other work already exposes the wall. It also disturbs landscaping, steps, patios and sometimes utilities, making restoration part of the budget.
Interior coatings and crack injections have narrower roles. A suitable injection may stop an isolated leak in a poured-concrete wall, but paint does not relieve groundwater pressure. Bowing walls, displacement or widening cracks call for an independent structural assessment before cosmetic repairs. Ask whether the proposed treatment addresses water pressure or only visible symptoms.
Ask who locates private buried lines, including irrigation and power to detached garages. These may fall outside the utility markings arranged through an 811 request.
- Require an explanation of why excavation beats a less disruptive option.
- Confirm permits, utility locating through 811 and responsibility for restoration.
- Distinguish waterproofing membranes from dampproofing intended for less demanding conditions.
5. Compare scopes, warranties and safety plans
Get itemized proposals rather than comparing a single headline price. Costs depend heavily on access, foundation depth, drainage length, permits and restoration, so national averages can mislead. Each bid should identify the diagnosed source, materials, discharge destination, maintenance obligations and exclusions. Read warranties for transfer rules and exceptions involving power failures, pump failure or continued wall moisture.
Never enter standing water when electrical equipment may be energized; contact the utility or emergency services if danger is immediate. Seek professional help for sewage contamination or substantial flooding. If outside groundwater remains high, rapid pumping can threaten the structure, so get guidance first. After source control, dry affected materials promptly and assess mold.
For interior trenching, require a dust-control plan and details for resealing slab openings. Ask how the installation will preserve any existing radon mitigation system.
As of October 2026, verify permits, discharge rules and contractor licensing with local authorities; site-specific evaluation remains essential.
AI Assistance Used — AI assistance was used in researching and drafting this article. It was reviewed, edited, and fact-checked by Jordan Singh before publication.