One Room Is Always Too Hot or Cold: What to Check Before Replacing HVAC
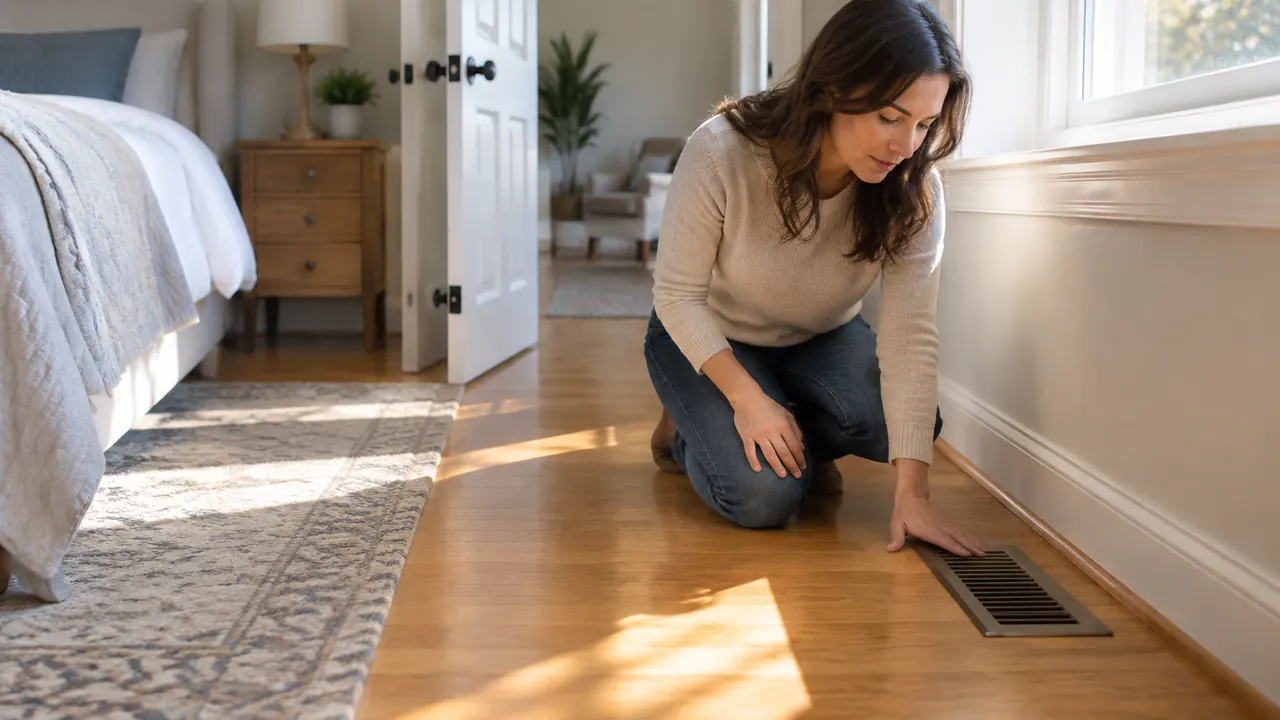
The bedroom bakes every afternoon, or the home office stays chilly while the hallway feels fine. That mismatch is frustrating, but it is not proof that your heating and cooling equipment needs replacing. When most of a house is comfortable and one room is not, the first questions concern airflow, heat gain, insulation and how the room connects to the rest of the house.
Before approving a replacement quote in 2026, work through a few checks that cost little or nothing. A dirty filter, blocked register or closed bedroom door can expose a problem that a new system would not fix. Keep the investigation safe: Do not remove equipment panels, adjust gas components, enter hazardous attics or cut openings in walls. The goal is to collect useful clues, make reversible changes and know when to request measurements rather than another equipment sales pitch.
1. Establish when the room goes out of balance
Start with a basic thermometer, not just how the room feels when you walk in. Place it away from direct sunlight, supply air, electronics and exterior glass. Compare the problem room with the thermostat area and another occupied room at similar times. Consumer thermometers can disagree, so place them together first or move the same device between locations, allowing it to settle. There is no universal acceptable room-to-room difference for every house.
Track the pattern for several days if conditions allow. A west-facing room that overheats late in the day suggests a different investigation than a bedroom that changes temperature whenever its door closes. Note whether the system is running, whether the problem happens in heating, cooling or both, and whether it started after renovation, new flooring or furniture rearrangement. If the whole house suddenly struggles, or airflow drops everywhere, contact a service technician sooner rather than treating it as a single-room issue.
- Record room temperatures, outdoor conditions and the approximate time.
- Note door positions, shade use and whether the HVAC is operating.
- Mention recent construction, added electronics or changes in room use.
2. Check the filter without guessing at an upgrade
A loaded filter can restrict system airflow, and a room at the end of a difficult duct run may reveal that restriction first. Turn the system off at the thermostat before checking an accessible filter, and follow the equipment instructions. Filters may sit at a return grille, an equipment cabinet or another designated location. Do not open unfamiliar service panels or assume every grille needs a filter; adding one where none belongs can create extra resistance.
Check the printed dimensions, installation direction and recommended replacement guidance. Replace a dirty disposable filter with a compatible product, with its airflow arrow pointing as the system instructions indicate. Wash a filter only if it is designed to be washable, and follow its drying instructions. Replacement frequency depends on the filter, operating hours, pets, dust and construction activity, not simply a calendar reminder.
A higher MERV rating describes filtration performance, not guaranteed compatibility with your blower and filter cabinet. Filter area, depth and design also affect resistance. If you want better smoke or particle filtration, ask which options the system can support and whether pressure should be measured. Do not operate without the required filter as a workaround for weak airflow.
3. Open and clear registers instead of shutting other rooms down
Check that the problem room's supply registers are open and not hidden by rugs, beds, curtains or furniture. Supply registers deliver conditioned air; return grilles draw room air back toward the equipment. Clear obstructions around both, and gently vacuum accessible surface dust with the system off. Avoid reaching tools into ducts, removing fixed components or trying to change concealed dampers. A register that looks clean does not establish that the duct behind it is connected or adequately sized.
Resist the temptation to close several other rooms' vents to force air toward the uncomfortable room. In many ducted systems, that raises resistance rather than sending the desired amount of air where you want it. Depending on the equipment and controls, the result can include more noise, greater duct leakage, reduced airflow or higher blower energy use. In severe cases, inadequate airflow can contribute to cooling-coil icing or furnace overheating and safety shutdowns. Small register adjustments may be appropriate, but closing multiple branches is not a substitute for measured balancing. Zoned systems with designed controls are a different arrangement.
| What you find | Safe first step | What remains unproven |
|---|---|---|
| Rug covering a floor supply | Move the rug fully clear | Whether delivered airflow is sufficient |
| Furniture against a return | Provide unobstructed clearance | Whether return capacity is adequate |
| Whistling after vents were closed | Reopen the vents | Whether system pressure is excessive |
| One register has little airflow | Check its accessible adjustment | Whether a duct or damper needs repair |
4. See whether a closed door traps the air
A supply duct cannot effectively serve a closed room unless air also has a suitable path back to the return side. Some homes have dedicated bedroom returns; others rely on central returns in halls. A gap beneath a door may help, but it is not automatically large enough for the room's airflow. New carpet, a door sweep or a tightly fitted replacement door can change that path.
Compare the room with its door open and closed under reasonably similar weather and operating conditions. A repeatable improvement with the door open is a clue, not a complete diagnosis. A technician can measure room pressure relative to the hallway with the system running and evaluate return capacity. Possible remedies include a properly designed transfer grille, jump duct or dedicated return, accounting for sound, privacy, fire protection and applicable codes. Do not cut a door or wall based solely on a comfort complaint, and never alter a fire-rated door.
- Keep existing return grilles clear, even when they are not near the thermostat.
- Document whether the closed-door problem occurs mainly overnight.
- Use an open-door comparison only when safe; do not compromise sleeping-room fire safety.
5. Separate sun and building-shell problems from airflow problems
Even good airflow may struggle against concentrated afternoon sun, a poorly insulated ceiling or leakage around windows. Rooms over garages, beneath roofs or at the end of additions deserve particular attention. Compare comfort with blinds or shades closed before the sun reaches the glass, rather than after the room heats up. Keep window coverings away from registers and follow cord-safety guidance around children.
Look for visible gaps around accessible window and door trim, damaged weatherstripping and obvious differences between this room and comfortable rooms. Air leakage and insulation defects are not always visible. A home-energy assessment can help identify them; blower-door testing and thermal imaging answer different questions than duct testing. Do not seal intentional ventilation openings, and seek advice when air sealing could affect combustion safety or ventilation.
A ceiling or portable fan can improve warm-weather comfort for an occupant, but it does not lower the room's air temperature. Turn it off when nobody benefits. Similarly, a smart thermostat with a room sensor may prioritize the troublesome room, but cooling that room longer can overcool the rest of the house. Sensors improve information and control; they do not repair missing insulation or restricted ducts.
6. Ask for professional measurements before authorizing repairs
If the basic checks do not resolve the issue, request a diagnostic visit focused on distribution and the room's heating and cooling load. Explain the timing, door effect and changes you tried. Ask whether the contractor performs airflow measurement and balancing, not simply equipment maintenance. Measurements should be interpreted against the equipment manufacturer's specifications and the home's design, rather than a single rule of thumb.
External static-pressure testing helps assess the resistance the blower faces. Measured supply airflow helps determine what reaches individual rooms. Duct leakage testing evaluates escaping air under test conditions, while inspection may reveal a disconnected branch, crushed flexible duct or poorly positioned damper. These are related checks, not interchangeable diagnoses. Ask for findings in writing and a clear connection between the proposed repair and your symptoms.
- Request an assessment of supply and return paths, including closed-door pressure when relevant.
- Ask whether duct leakage testing is warranted and what areas the inspection can access.
- Have balancing performed with appropriate instruments, followed by a comfort check.
- Get repair scope, access requirements and any restoration costs in writing.
7. Consider equipment only after identifying the room's needs
Bigger equipment does not guarantee more useful air at a weak branch. Existing ducts may be unable to carry the additional airflow, and an oversized conventional air conditioner can satisfy the thermostat too quickly, reducing moisture removal during some conditions. Variable-capacity equipment offers more flexibility, but it still needs suitable ducts, controls and sizing.
If replacement is justified by condition, performance or broader needs, request a room-by-room load calculation using ACCA Manual J or an appropriate equivalent, rather than matching the old nameplate or estimating by floor area alone. Equipment selection and duct design should follow those loads. Ask how the proposal will address this particular room and how results will be verified.
Sometimes the answer is duct repair, insulation, measured balancing or carefully designed supplemental conditioning rather than a larger central system. Compare the scope and expected trade-offs, not just the equipment price. The best next purchase is the one tied to a demonstrated problem.
Consult a qualified HVAC or home-performance professional for testing, code requirements and repairs beyond safe, accessible homeowner checks.
AI Assistance Used — AI assistance was used in researching and drafting this article. It was reviewed, edited, and fact-checked by Nadia Clarkson before publication.