How to Thaw Frozen Chicken Safely When Dinner Cannot Wait
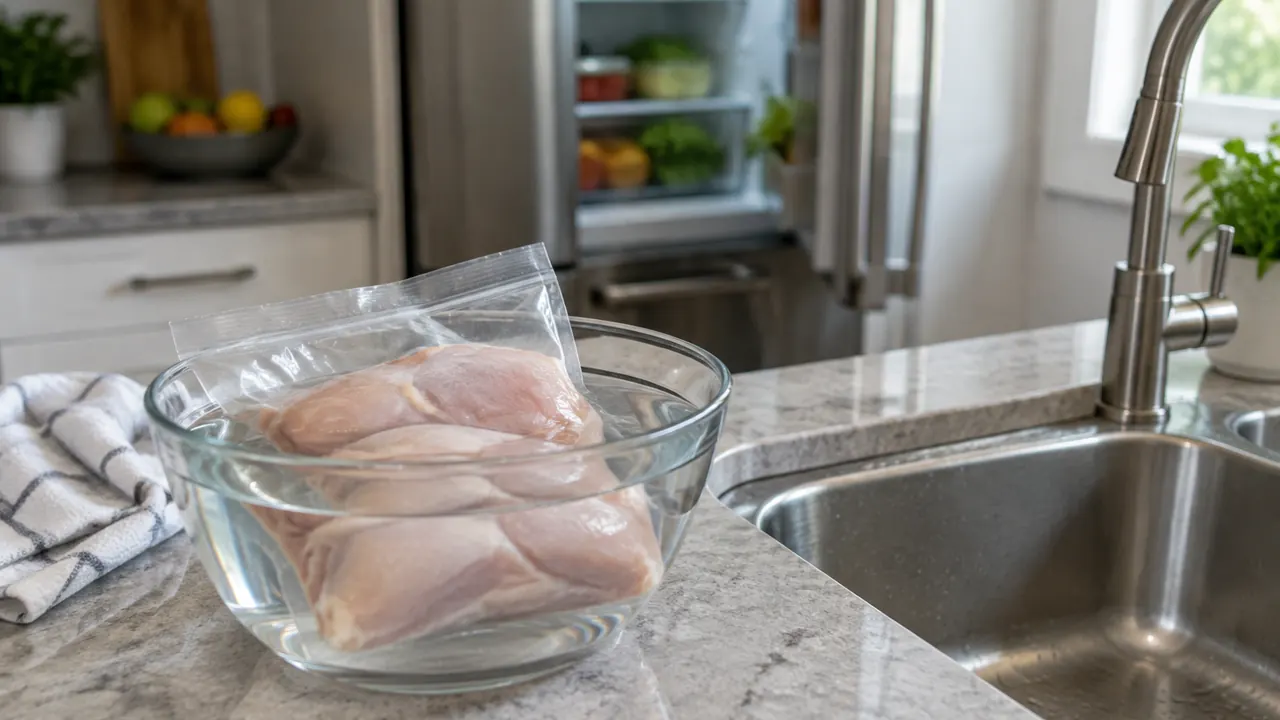
It is almost dinnertime, and the chicken you meant to move out of the freezer is still hard as a brick. You have safe options, but leaving it on the counter while you decide is not one of them. The right choice depends on the size of the package, whether the pieces are frozen together and how soon you can start cooking. A thin package of boneless chicken is a different scheduling problem from a whole bird.
For home cooks in 2026, the core food-safety guidance remains straightforward: thaw chicken in the refrigerator, in cold water or in the microwave. Refrigerator thawing offers the most flexibility afterward; cold water and the microwave require immediate cooking once thawing is complete. Some chicken can also go directly from freezer to oven or stovetop. Whichever route you choose, a food thermometer—not the color of the meat or its juices—determines when dinner is safely cooked.
1. Choose the method that fits your actual deadline
Start by checking the package weight and shape. A flat, one-pound package has far more surface area exposed to its surroundings than a thick stack of breasts weighing the same amount, so it generally thaws faster. Bone-in pieces, tightly packed portions and whole chickens take longer. The times below are planning estimates, not promises; check progress rather than assuming a timer means the center has thawed.
If dinner is less than an hour away, microwave thawing may be the practical choice for a manageable portion. Cooking separate pieces from frozen can also work if your recipe and equipment accommodate them. Cold-water thawing is useful when you have more time and can stay nearby. Refrigeration is the best low-maintenance option, but it is a plan-ahead method, not a rescue for tonight's frozen whole chicken.
- Need food soon? Choose a small portion you can thaw and cook promptly, or consider an appropriate frozen-start recipe.
- Have a few hours? Use cold water and set recurring reminders to change it.
- Cooking tomorrow or later? Move the chicken to the refrigerator now and build in extra time.
| Method | Realistic planning time | What happens next |
|---|---|---|
| Refrigerator at 40°F or below | A full day or longer for many packages; whole birds may need 1–2 days or longer | Cook within 1–2 days after thawing |
| Cold water | About an hour or less for a small package around 1 pound; roughly 2–3 hours for 3–4 pounds | Cook immediately after thawing |
| Microwave defrost | Often minutes for small portions; varies substantially by weight, shape and appliance | Cook immediately after thawing |
| Cook from frozen | Often about 50% longer than comparable thawed chicken in an oven or on a stovetop | Verify at least 165°F throughout |
2. Refrigerator thawing gives you the most breathing room
Keep the refrigerator at 40°F or below, verified with an appliance thermometer. Put the wrapped chicken in a rimmed dish or leakproof container on a low shelf, where escaping juices cannot drip onto ready-to-eat food. Leave it wrapped while it thaws. The refrigerator keeps the outside cold while the center gradually softens, which is why this method does not require cooking the moment the last ice crystals disappear.
Allow at least a full day for many packages of parts or boneless breasts. A whole chicken commonly needs one to two days and may need longer if it is large or the refrigerator runs especially cold. Dense packages can also take longer than expected. If you are planning dinner for guests, moving the chicken a little earlier is safer than counting on an exact overnight turnaround.
Once thawed in the refrigerator, raw chicken can remain refrigerated for an additional one to two days before cooking. If your plans change, refrigerator-thawed chicken can be refrozen without cooking, although it may lose moisture and quality. That flexibility applies to chicken kept safely cold; refrigeration does not erase earlier time spent at unsafe temperatures. If the middle is still frozen when cooking must begin, finish thawing with a safe faster method or use a suitable frozen-start cooking approach.
3. Cold water is the hands-on middle ground
For cold-water thawing, put the chicken in a leakproof plastic bag before submerging it in a bowl or other clean container of cold tap water. Store packaging is not always watertight, especially a foam tray covered with thin film. A sound outer bag keeps water out and helps contain raw juices. Place the container where splashes cannot reach dishes, utensils or food you will eat without further cooking.
Change the water every 30 minutes so it stays cold and continues transferring heat effectively. Do not substitute warm or hot water to speed things up. A small package around one pound may thaw in an hour or less, while a three- to four-pound package may take two to three hours. A solid block can take longer. Keep the bag submerged, using a clean plate to hold it down if necessary.
Cook chicken immediately after cold-water thawing; do not treat it as newly refrigerator-thawed meat with another day or two of storage available. If you want to freeze it again, cook it first. This method works best when you are home, attentive and ready to turn on the stove or oven as soon as thawing finishes.
- Check the bag for holes and seal it securely before it goes into the water.
- Set a 30-minute timer each time you replace the water.
- Keep the chicken contained; do not rinse exposed raw poultry under the faucet.
- Wash and sanitize the bowl, sink and any surfaces touched by raw juices afterward.
4. Microwave thawing is fastest, but cooking cannot wait
Use your microwave's defrost setting and the manufacturer's directions for the chicken's weight. Remove store wrapping, foam trays, absorbent pads and any metal clips unless the packaging specifically permits microwave use. Transfer the chicken to a microwave-safe dish that will catch liquid. Small portions may defrost in minutes, but there is no dependable universal minutes-per-pound rule across different microwave wattages, portion sizes and shapes.
Pause as directed to turn the chicken and separate pieces as they loosen. Check frequently because thin edges can become warm or begin cooking while the middle remains frozen. Avoid running a long, uninterrupted cycle simply to force a stubborn center to soften. A whole chicken or bulky block may be awkward to thaw evenly and can exceed what your appliance can handle comfortably; use its instructions rather than improvising.
Chicken thawed in the microwave must be cooked immediately. Have the pan, oven or other cooking equipment ready before starting defrost. Microwave thawing can warm parts of the meat into temperatures where bacteria multiply, and partially cooked spots are not a finished safety treatment. Do not microwave-defrost chicken in the morning and leave it refrigerated until dinner. If you need that kind of scheduling flexibility, choose refrigerator thawing instead.
5. Sometimes the safest shortcut is cooking from frozen
Raw chicken can be cooked from frozen in an oven or on the stovetop, provided it reaches a safe internal temperature throughout. USDA guidance says cooking may take about 50% longer than for thawed chicken. Treat that as a rough planning allowance, not a formula that guarantees doneness. Thickness, whether pieces are separated, the cooking temperature and the starting temperature all affect the result.
Individually frozen breasts or thighs are easier to manage than a block of chicken fused together. Use a recipe designed for frozen chicken when possible, and allow space for even heating. Do not force a knife between rock-hard pieces. For a whole bird, account for any bag of giblets and remove it when it can be safely released; follow product instructions, especially if packaging inside the cavity is not intended to be heated.
Do not cook frozen chicken in a slow cooker or use the microwave to cook it directly from frozen; USDA advises against both approaches. Microwave thawing followed immediately by cooking is different. For an electric pressure cooker or air fryer, follow appliance instructions and a reliable frozen-chicken recipe, including limits on size and arrangement. Frozen breaded chicken deserves particular attention: a browned coating does not mean the product is cooked. Follow its package directions and verify temperature.
6. Countertop thawing creates a warm-outside, frozen-inside problem
A frozen center does not protect the chicken's surface. On the counter, the outside can warm into the food-safety danger zone, between 40°F and 140°F, while the middle is still icy. Bacteria can multiply in those warmer areas. That is why countertop thawing is not recommended, even if the package feels cold when you pick it up. A garage, porch or parked car is not a controlled refrigerator either.
Perishable food should not sit at room temperature for more than two hours, or more than one hour when the surrounding temperature is above 90°F. Those are discard limits, not permission to use the counter as a thawing method. If chicken has exceeded them, discard it. Cooking cannot reliably undo every hazard created by improper storage. When the time and temperature history are uncertain, do not taste it to investigate or rely on smell: harmful bacteria may cause no noticeable odor.
7. Finish with a thermometer and a clean kitchen
Cook chicken to at least 165°F, checking with a food thermometer. For breasts and individual pieces, measure in the thickest part without touching bone. For a whole bird, check the thickest breast area and the innermost parts of the thigh and wing. Test several pieces if they differ in size. Thawing unevenly can lead to uneven cooking, so a single reading from the smallest piece is not enough.
Wash your hands with soap and water for at least 20 seconds after handling raw chicken or its packaging. Keep raw juices away from salads and cooked food, and use a clean plate for the finished chicken. Refrigerate leftovers within two hours, or one hour above 90°F, in shallow containers for prompt cooling. The quickest safe dinner is not necessarily the fastest thaw: it is the method you can complete correctly, followed by thorough cooking and careful cleanup.
For unusual storage situations or appliance-specific questions, consult current USDA food-safety guidance and your appliance manufacturer's instructions.
AI Assistance Used — AI assistance was used in researching and drafting this article. It was reviewed, edited, and fact-checked by Jordan Singh before publication.