After a Storm Damages Your Roof: A Homeowner's First-Steps Checklist
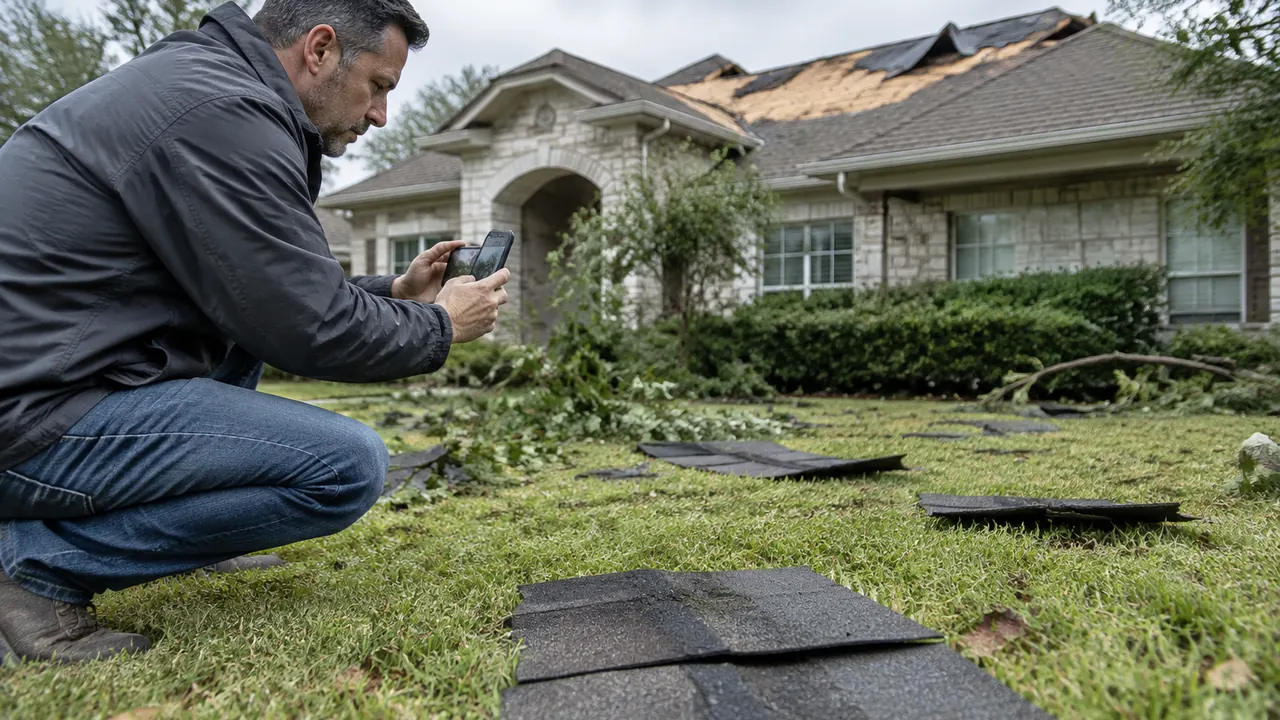
After a storm, the first missing shingle or ceiling stain can trigger an understandable urge to get upstairs, find the leak and fix it immediately. Resist the ladder. Wet roofing, weakened decking, loose branches and nearby electrical lines can turn a property problem into a serious injury. Your first job is to protect people, document what you can see safely and arrange qualified help to prevent additional damage.
For homeowners navigating a roof claim in 2026, the practical challenge is managing several decisions at once: emergency work, insurance deadlines, contractor pitches and electronic paperwork that may arrive before anyone has inspected the damage. You do not need to diagnose the roof or agree to a full replacement on the first day. This checklist separates urgent protection from decisions that deserve verification, a written estimate and a careful read.
1. Make the property safe before documenting damage
Wait until the storm has passed and local officials say conditions are safe. Look from a protected location before walking into the yard. Stay away from downed wires, trees leaning toward the house, hanging limbs and debris touching electrical equipment. Treat every fallen line as energized; contact emergency services or the utility rather than approaching it.
Inside, watch for sagging ceilings, spreading cracks, water near fixtures and unusual shifting sounds. Leave affected areas, and leave the home if you suspect structural instability. Do not enter standing water to reach a breaker panel or touch wet switches. Call 911 for immediate danger; otherwise, arrange appropriate utility, electrician or structural assistance.
Even an apparently accessible roof can conceal storm damage. Leave ladder inspections, attic entry with questionable footing and roof access to qualified professionals. A drone is not essential, either: flying near power lines, emergency operations or people introduces separate risks. Ground-level documentation is enough to start a claim conversation, and you can ask the insurer or roofer to supply close-up inspection images later. If a damaged area cannot be reached safely, leave it undocumented for now and explain why.
2. Build a ground-level record before cleanup
Use your phone from stable ground, keeping well back from damaged eaves and trees. Start with wide views showing the house and surrounding property, then zoom in on visible damage. Photograph each accessible side, including gutters, siding, windows, fences and detached structures. Record what you observe without guessing that every mark came from this storm.
Indoors, photograph stains, drips and damaged belongings only where access is safe. Save original files rather than just screenshots or compressed messaging copies. Back them up, group them by date and location, and retain older roof photos or maintenance records for comparison. A weather alert can help establish timing, but it does not prove damage to your particular roof.
- Capture shingles or roofing fragments where they landed before moving them, if it is safe and does not delay urgent protection.
- Take both room-wide and close-up photos of interior water damage, including walls, floors and affected contents.
- Write down when the storm occurred, when you first noticed damage and whether leaking continued afterward.
- Keep a short video walkthrough with factual narration; avoid climbing, reaching over edges or stepping under loose materials.
- Ask professionals for dated inspection photos and written findings, including areas they could not inspect.
3. Limit further damage with narrowly scoped emergency work
Most homeowners policies require reasonable steps to protect damaged property from further loss. That does not mean risking injury or committing immediately to a new roof. Move belongings away from leaks when safe, catch small drips without entering hazardous areas and call a qualified roofer or emergency mitigation company for temporary protection.
If practical, ask the insurer about emergency work before authorizing it. If waiting would allow more damage, prioritize reasonable, necessary protection and document why it could not wait. Coverage and reimbursement depend on your policy and circumstances, so do not assume every emergency charge will be paid. Get a written scope and price, or clear pricing terms, before work begins.
Separate temporary stabilization from permanent repairs. Have the contractor explain what the service includes, how long protection should last and whether follow-up is needed. Save before-and-after images and itemized invoices. Do not delay necessary drying solely to preserve evidence; document wet materials before removal when possible. Ask about retaining representative samples, but do not keep hazardous debris or contaminated materials in living areas.
| Situation | Immediate priority | What to document |
|---|---|---|
| Active roof leak | Qualified temporary covering or stabilization | Leak locations, scope and pricing |
| Wet interior materials | Safe assessment and necessary drying | Photos, moisture findings and equipment charges |
| Possible structural damage | Keep people out; obtain professional assessment | Visible warning signs from a safe location |
| Permanent roof replacement proposed | Review evidence, coverage and bids | Inspection findings and detailed estimate |
4. Notify the insurer and clarify the next deadlines
Contact your insurer or agent promptly through the number on your policy, its verified website or its official app. Do not rely on a link supplied by an unsolicited visitor. Describe the storm, visible damage and emergency measures, distinguishing observations from a contractor's conclusions. Ask whether the contact opens a claim and obtain the claim number, assigned contact and instructions.
Your policy may have a separate wind, hail or named-storm deductible, potentially calculated as a percentage of the dwelling coverage limit rather than the repair bill. Roof coverage may also involve actual cash value, depreciation or a payment schedule. Ask the representative to identify the provisions that apply instead of relying on a general promise of coverage.
- Ask for notice, proof-of-loss, document-submission and repair deadlines in writing; do not assume they are all the same.
- Confirm how inspections will be arranged and what to do if temporary work must happen first.
- Ask whether depreciation is recoverable, what conditions apply and when supporting invoices must be submitted.
- Clarify coverage for code-required upgrades, debris removal and additional living expenses if the home is uninhabitable.
- Ask how to submit additional damage discovered during repairs and whether approval is needed before expanding work.
5. Vet storm-chasing offers without dismissing legitimate help
A door-to-door offer is not automatically a scam, but it is not proof of competence, either. Collect the company's legal name, physical address, phone number and any required license number. Verify licensing through the appropriate state or local agency; requirements differ by location and trade. Confirm liability insurance and workers' compensation coverage, where applicable, through the insurer or agent.
Look for experience with your roofing material, check recent references and compare written estimates when conditions allow. An out-of-area contractor may be legitimate, but ask who handles warranty calls after the crews leave. Treat pressure to sign immediately, large upfront cash demands and claims that the insurer will certainly buy a roof as warning signs. Promises to hide or waive your deductible may violate state law.
Keep inspection permission separate from repair authorization. Ask whether an inspection is free, whether photos will be provided and whether anything you sign creates an obligation. Do not let a visitor turn a supposedly simple inspection form on a tablet into an exclusive repair contract. Verify names independently rather than trusting badges, truck graphics or references the salesperson insists you call while standing at your door.
6. Read claim-related paperwork as separate transactions
Before signing anything, request a complete copy, including attachments, prices, cancellation terms and signature pages. Electronic signatures can create binding agreements. Read on a larger screen if necessary, and do not sign blank spaces or accept assurances that unfavorable language is merely standard. Whether a cancellation right exists depends on the transaction and applicable law.
Be especially careful with assignments of benefits, payment directions, contingency agreements and powers of attorney. They do different things: some may transfer rights, route insurance proceeds or create payment obligations if a claim is approved or a contract is canceled. Their availability and enforceability vary by state. Ask the insurer or an independent attorney about language you do not understand; the salesperson is not an independent adviser.
| Document | Main question before signing |
|---|---|
| Inspection authorization | Does this permit only inspection, or also obligate repairs? |
| Emergency work order | What work, rates and limits am I approving? |
| Repair contract | What is included, excluded and payable regardless of insurance? |
| Assignment or payment direction | What rights or control over proceeds would I give up? |
| Public adjuster agreement | Is the adjuster licensed, and how are fees calculated? |
7. Keep one repair file through final payment
Create a single digital folder, with a backup, for photos, estimates, signed documents, permits, invoices and payment records. Keep a dated contact log and confirm important phone discussions by email. Compare the insurer's estimate with the contractor's scope line by line; differences in quantities, materials or code requirements should be explained, not papered over with a verbal promise.
Document newly discovered damage before it is covered up, and obtain written change orders identifying added cost and any schedule impact. Ask how required inspections and permits will be handled. If claim payments include your mortgage company, confirm its endorsement and release process early so repair funding does not stall unexpectedly.
Before final payment, review completed work from the ground and request completion photos, warranty information, inspection approvals where required and appropriate lien releases. Do not climb onto the roof to check workmanship. If coverage or payment remains disputed, request the insurer's written explanation and relevant policy language; your state insurance department can explain complaint options. Keep the file after the claim closes.
Check your current policy, state rules and contract terms, and consult qualified roofing, insurance or legal professionals for advice specific to your damage and paperwork.
AI Assistance Used — AI assistance was used in researching and drafting this article. It was reviewed, edited, and fact-checked by Leah Fornier before publication.