Household Mold: When Cleanup Is a DIY Job and When to Get Help
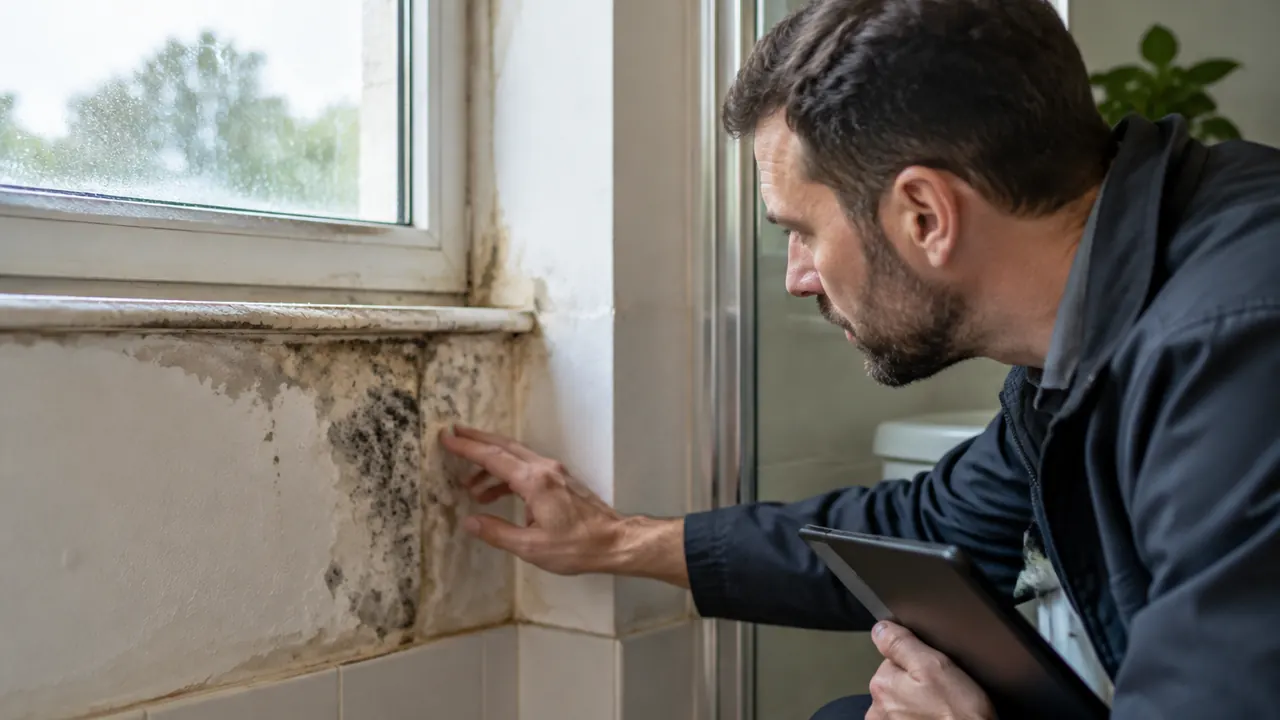
A small patch of mold below a bathroom window can look like a weekend cleaning job. Sometimes it is. But the visible stain does not tell you whether water is entering through the window frame, soaking the wall cavity or repeatedly condensing on a cold surface. Before reaching for a scrub brush, assess four things: how much area is affected, what material is moldy, where the moisture comes from and whether anyone in the household faces higher health risks.
For households making that decision in 2026, the practical starting point remains moisture control, not a particular cleaning product or test result. U.S. Environmental Protection Agency guidance says homeowners can usually handle mold affecting less than about 10 square feet themselves, while noting important exceptions. That is a screening guideline, not a guarantee of safety. A small spot connected to sewage, hidden damage or a contaminated ventilation system calls for a different response.
1. Measure the problem without opening it up
Start with a visual inspection and photographs. Estimate each patch's length and width, then add the affected areas rather than treating every spot as a separate small job. Ten square feet is roughly a rectangle 2 feet by 5 feet. Note staining, peeling paint, swollen trim, soft drywall and musty odors beyond the visible growth. These clues can suggest a larger moisture problem, although none alone proves hidden mold.
Do not peel back wallpaper, cut drywall or pull up flooring just to see what is underneath. Disturbing concealed growth can spread contamination and turn a manageable inspection into demolition. If the surface is deteriorating, the odor is strong without an obvious source, or several rooms are affected, arrange an assessment. Older building materials may also require evaluation for lead or asbestos before disturbance.
- Photograph the full wall or room as well as the close-up patch, and record when you first noticed it.
- Look for connected damage above, below and behind nearby fixtures without dismantling anything.
- Treat recurring spots as evidence that the cause needs another look, even if each cleanup seems successful.
- Avoid judging risk by color: black, green or white growth cannot reliably identify a species or its health effects.
| What you find | Likely next step |
|---|---|
| Small, accessible patch on an intact hard surface | Consider DIY after checking moisture and health risks |
| More than about 10 square feet of growth | Consult EPA guidance and consider professional help |
| Soft wall, hidden odor or repeated regrowth | Investigate concealed moisture before cleaning |
| Sewage exposure or suspected HVAC contamination | Get qualified help rather than attempting routine cleanup |
2. Find and stop the water first
Mold cleanup will not last if materials keep getting wet. Beneath a window, possible causes include failed flashing, leaking seals, blocked drainage paths or indoor humidity condensing on cold glass. A plumbing leak can travel along framing before appearing somewhere else. Roof leaks, foundation seepage and poorly vented bathrooms create similar puzzles. Match the repair to the cause; adding caulk to the visible stain's nearest edge may not fix the entry point.
If water is actively entering, stop its source when you can do so safely and arrange the appropriate repair. Keep away from wet electrical equipment or sagging ceilings. Dry wet materials promptly; EPA guidance emphasizes drying within 24 to 48 hours to help prevent mold growth. That window is not a promise that mold cannot appear sooner or that delayed materials are automatically salvageable.
Use a humidity meter to track conditions rather than guessing. EPA recommends keeping indoor relative humidity below 60 percent, ideally between 30 and 50 percent when possible. Run bathroom exhaust fans that vent outdoors, and use air conditioning or a dehumidifier as conditions require. Avoid blowing fans directly across visible mold, which can disperse particles. A moisture meter can help locate wet material, but its reading does not diagnose mold or establish that a wall cavity is clean.
3. Decide whether the material can be cleaned
An intact tile or metal surface is a different project from wet drywall. Mold on hard surfaces can often be removed with detergent and water, followed by thorough drying. Porous materials can hold growth within spaces that surface scrubbing cannot reach. Moldy ceiling tiles, insulation and carpet may need disposal. Drywall that is moldy, crumbling or persistently wet often requires removal rather than repeated wiping.
Material condition matters as much as its name. A small surface patch on sound painted drywall may be cleanable, but swollen paper facing or softness suggests a deeper problem. Wood is not automatically disposable: sound framing may be salvageable with appropriate cleaning and drying. Extensive framing damage, suspected decay or work inside a wall deserves professional evaluation. Do not sand moldy surfaces as a casual shortcut.
Separate damaged items from unaffected belongings without carrying uncovered debris through the home. Bag small discarded materials at the work area, if removal is appropriate for DIY, and check local disposal requirements. Valuable papers, upholstered furniture and sentimental textiles may warrant specialist advice; sometimes replacement is the more practical choice.
| Material | Typical approach | Reason to get help |
|---|---|---|
| Tile, glass or metal | Clean with detergent and water; dry | Growth extends into adjoining wall or floor |
| Painted drywall | Assess coating and underlying condition | Softness, swelling or growth beneath the surface |
| Carpet, insulation or ceiling tile | Removal may be necessary | Large area, contaminated water or difficult containment |
| Solid wood | Assess soundness, then clean and dry appropriately | Decay, structural concerns or extensive hidden growth |
4. Put household health ahead of the square-foot rule
Mold exposure can trigger allergic symptoms and irritate the eyes, skin, nose, throat or lungs. It can also worsen asthma. People with weakened immune systems or chronic lung disease may face additional risks and should not do mold cleanup. Someone with asthma, significant allergies or another relevant condition should ask a clinician whether being present during cleanup is appropriate, even when the affected area is small.
Keep children, pets and people not involved in the work away from the cleanup area. If you cannot separate the work from a vulnerable household member, professional help or temporary arrangements elsewhere may be the safer option. A contractor's containment plan should account for who lives there, not just the amount of visible growth.
- Seek urgent medical care for serious breathing difficulty; do not wait for a mold inspection or test result.
- Discuss persistent symptoms with a clinician rather than assuming mold is the only possible cause.
- Avoid cleanup involving sewage or other contaminated water, which introduces hazards beyond mold.
- If mold may involve heating or cooling equipment, do not run the suspected contaminated system; have it assessed before operation spreads contamination.
5. Keep a small DIY cleanup controlled
Proceed only when the area is limited, the material is suitable, the water problem is addressed and household risks are manageable. Wear gloves, protective goggles without ventilation holes and at least a properly fitted N95 respirator. An N95 filters particles, not cleaning-product gases, and facial hair can interfere with its seal. Follow product instructions for glove selection, ventilation and other precautions.
Scrub hard surfaces with detergent and water, avoiding unnecessary soaking, then dry them completely. Routine mold cleanup does not require bleach; EPA does not recommend biocides as a routine practice. Killing mold is not enough because dead mold can still cause allergic reactions and must be removed. If a disinfectant is needed for another reason, follow its label and never mix bleach with ammonia, acids or other cleaners.
- Keep doors to unaffected rooms closed where practical, and avoid spreading dust or tracking debris through the home.
- Do not dry-brush growth or use an ordinary household vacuum on moldy debris.
- Bag waste before moving it out, and clean reusable tools without contaminating other surfaces.
- Stop if cleaning reveals soft material, more extensive growth or an inaccessible wet cavity; reassess rather than expanding into demolition.
6. Skip the paint-over fix and routine home testing
Painting or caulking over mold hides evidence without removing growth or correcting moisture. Paint applied to a damp, moldy surface can peel, and the problem can return through or around the coating. Clean or remove affected material, repair the water source and confirm adequate drying before refinishing. A mold-resistant coating may help in an appropriate location, but it cannot compensate for a leaking window or chronically wet wall.
A home test kit does not solve that diagnostic problem. Mold spores are normally present indoors and outdoors, so growth on a sampling plate does not by itself establish an unusual exposure or identify the source. EPA notes there are no federal limits for mold or mold spores against which a home sample can establish compliance. A result cannot certify a house as safe.
When mold is visible, sampling is usually unnecessary before deciding to remove it and fix the moisture. Specialized testing can sometimes answer a specific investigative question, but it should have a clear purpose and qualified interpretation. Spend first on finding the leak and assessing damaged materials, not on a kit marketed as a substitute for those steps.
7. Hire for a defined scope, then verify the result
For a larger or complicated problem, look for a remediation contractor with relevant experience, appropriate insurance and any license required in your state or locality. Requirements vary, so verify credentials with the issuing authority. Ask whether an independent assessor would be useful, particularly for extensive hidden damage or a disputed scope. For costly work, compare written proposals based on what they include, not just the total.
The proposal should identify affected areas, containment, material removal, cleaning, drying and disposal procedures. It should also explain who repairs the leak and replaces building materials; those tasks may require separate trades. Ask what will establish completion and whether any proposed testing has a defined purpose. Be cautious about promises to eliminate every spore or solve concealed damage with a spray alone.
Afterward, check that visible growth, moldy debris and musty odors are gone and the moisture source is corrected. An odor-free room alone is not proof of success. Document repairs and revisit the area after rain or normal bathroom use. Renters should report leaks and mold to management in writing and retain photos; unresolved problems may warrant contacting local housing or health authorities.
Consult a qualified mold, building or medical professional when damage, moisture conditions or household health risks make DIY cleanup uncertain.
AI Assistance Used — AI assistance was used in researching and drafting this article. It was reviewed, edited, and fact-checked by Jordan Singh before publication.