Starting to Sew: The Tools You Need and the Ones That Can Wait
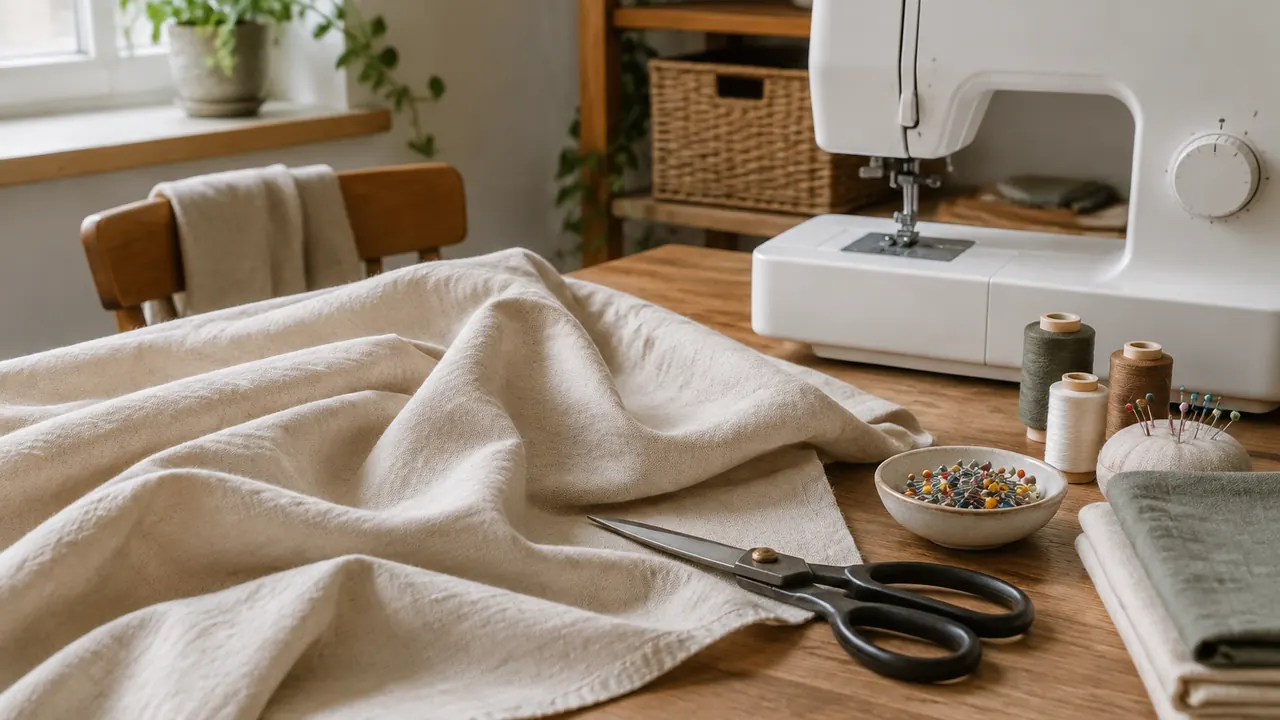
Starting to sew does not require a room full of equipment. If your first goals are replacing a button, closing an opened seam or making a simple fabric bag, a small kit can handle most of the work. The expensive mistake is shopping for every possible project before discovering which ones you enjoy. Buy for the next repair or beginner project, then add tools when a specific task makes their purpose clear.
For a beginner shopping in 2026, the useful comparison is not how many pieces a bundle contains, but how many you will actually use. A packet of suitable needles and scissors that cut cleanly matter more than dozens of accessories with unfamiliar names. Start with hand-sewing basics, choose forgiving fabric and treat a sewing machine as a tool to test, not an admission ticket. Borrowing equipment or paying for one introductory lesson may be the more useful first expense.
1. Let the first job define the kit
Choose a low-stakes task before shopping: reattach a shirt button, repair a short opening along an existing seam or make a drawstring bag from plain cotton. These jobs teach useful skills without demanding exact garment fit. Save fitted pants, slippery occasionwear and sentimental heirlooms until you can control your stitches and recognize when a repair needs reinforcement rather than simply more thread.
For those first jobs, gather the essentials below. You may already own a ruler, an iron and a suitable storage box. Buy a small amount of dependable thread instead of a rainbow assortment; match the garment for visible repairs and use a practical neutral for practice. Large kits are not automatically poor value, but duplicate notions and mystery attachments should not count as savings.
- Hand-sewing needles in a small assortment, plus general-purpose thread suitable for your fabric.
- Fabric scissors, a seam ripper and a few straight pins or sewing clips.
- A flexible measuring tape or ruler, plus a removable fabric-marking tool.
- An iron and a stable, heat-safe pressing surface, using the fabric’s care instructions.
- A small, closable container that keeps sharp tools away from children and pets.
2. Choose fabric that makes learning easier
For a first machine-sewn project, choose a stable, medium-weight woven cotton, such as quilting cotton or cotton broadcloth. It generally stays put while you measure, cut and stitch. Avoid very loose weaves, heavy upholstery fabric and anything that stretches noticeably. A plain color or small, nondirectional print also eliminates the work of matching stripes, centering large motifs or keeping a one-way design upright.
Read the project instructions before buying fabric, including the recommended type, width and amount. A remnant can be economical, but only if it is large enough and its fiber content and care needs are known. An old cotton pillowcase can provide practice material if it is sound, not thinned or brittle. For washable projects, wash and dry the fabric as you expect to care for the finished item, then press it before cutting.
Repair fabric should behave reasonably like the original. A stiff patch on a stretchy knee can pull at its edges, while a weak scrap may fail quickly. Test your needle, thread, stitch and iron setting on a scrap when possible. Keep fabric shopping modest: enough for one project, with the allowance specified by its instructions, is more useful than an aspirational stack.
| Fabric | Beginner suitability | What to watch |
|---|---|---|
| Medium-weight woven cotton | Good first choice | Prewash washable projects; check shrinkage |
| Lightweight cotton lawn | Manageable with practice | Fine fabric can pucker |
| Stretch jersey | Better after basic practice | Needs stretch-compatible needles and stitches |
| Satin or very slippery fabric | Usually wait | Shifts during cutting and sewing |
| Heavy denim | Usually wait | Thick seams may exceed machine capacity |
3. Match the needle and thread to the job
Hand needles and machine needles are different purchases. For hand sewing, a small assortment of sharps covers many ordinary woven-fabric repairs. Needle numbering can be confusing: for many hand-needle types, a higher number means a finer needle, while higher machine-needle size numbers indicate a thicker needle. Follow the package’s fabric guidance rather than assuming all numbering systems work alike. A thimble can help you push a hand needle without pressing its blunt end into your finger.
For many lightweight to medium-weight woven cottons, a universal machine needle in size 80/12 is a common starting point, not a universal rule. Knits may need a ballpoint or stretch needle; denim may need a jeans needle. Confirm the needle system in the machine manual. Install needles as directed, and replace one that is bent, blunt or damaged. Persistent skipped stitches call for troubleshooting, not simply pulling harder on the fabric.
General-purpose polyester thread works for many household repairs and beginner machine projects, although fabric, care requirements and project instructions may call for something else. Avoid using heavy button or upholstery thread in a machine unless its instructions permit it. Keep the first purchase simple: one or two useful colors, then buy specialty thread when a project requires it.
4. Buy one good cutting tool before a cutting system
A pair of comfortable fabric scissors is enough for your first projects. Choose a size you can control, and try the grip if shopping in person. The blades should cut through your intended fabric without chewing or leaving uncut spots. Reserve them for fabric to help preserve their edge; use existing household scissors for paper patterns. Left-handed beginners should consider true left-handed scissors rather than assuming a symmetrical handle solves blade visibility.
A seam ripper belongs in the starter kit because undoing stitches is part of learning. Work in good light and cut a few stitches at a time without forcing the point into the fabric. A rotary cutter can speed up straight cuts, but it brings companion purchases and an exposed-blade hazard. Wait until repeated cutting makes a cutter, mat and suitable ruler worthwhile.
- Use pins within the seam allowance when possible; clips can avoid holes in delicate or coated materials.
- Remove pins before the machine needle reaches them, and keep fingers clear of the needle.
- Test marking tools on a scrap; some marks persist or react to heat.
- Close scissors and retract or cover rotary blades immediately after use.
5. Learn what a machine adds before buying one
Hand sewing is often the simplest answer for a missing button or a small opening in a lining. A machine becomes more useful when you need long, consistent seams, repeated projects or stitches suited to particular fabrics. It will not eliminate measuring, cutting, pressing or finishing. Those steps often determine whether a beginner project looks tidy, even when the actual sewing takes only minutes.
For basic projects, prioritize a controllable straight stitch, zigzag, reverse function and clear instructions. Check that the machine uses readily available needles and its specified bobbins; similar-looking bobbins are not necessarily interchangeable. A buttonhole function is useful if your projects need it. Hundreds of decorative stitches, embroidery connectivity and elaborate accessories can wait. Test slow sewing and several fabric layers if a demonstration is available.
Compare the total usable setup, not just the advertised machine price. A used machine may need service, a power cord, a pedal or missing accessories. Ask what is included and whether parts and local repairs are available. For any purchase, read the seller’s current return policy and warranty terms, including exclusions and shipping responsibilities. An inexpensive machine that frustrates you is not necessarily the economical choice.
| Option | Best fit | Check first |
|---|---|---|
| Hand sewing | Buttons and small repairs | Whether the repair needs reinforcement |
| Borrowed machine | Testing occasional machine work | Permission, manual and working condition |
| Class or shared workspace | Guided first projects | Equipment, supplies and access rules |
| Basic machine purchase | Regular home sewing | Controls, support and total setup cost |
| Serger | Frequent seam finishing or knit work | A specific need; it does not replace every machine function |
6. Borrow or take a class when guidance is the missing tool
Borrowing makes sense when you are unsure whether sewing will become a habit or need a machine for one project. Ask a friend or relative for a short demonstration, not just the equipment. Photograph the correct threading path with permission, locate the manual and clarify who handles needles, damage or servicing. Do not try to revive an unfamiliar, malfunctioning machine by repeatedly forcing it to run.
Some libraries, community centers, makerspaces and sewing shops offer equipment access or beginner classes, but availability and rules vary. Check current local listings rather than assuming machines can leave the building. A class is particularly useful if threading, tension or pattern instructions keep stopping you. Look for a small first project and hands-on instruction instead of a session built mainly around selling equipment.
- Ask whether a machine is supplied and whether you will learn threading, bobbin setup and safe operation.
- Confirm the complete cost, including fabric, notions, access fees and any required orientation.
- Check age restrictions, accessibility, cancellation terms and whether the session suits complete beginners.
- If bringing your own machine, ask whether the instructor can help with that model.
7. Let finished projects earn the next purchase
Make your first project small enough to finish: a cloth napkin, simple drawstring bag or basic cushion cover with an overlapping opening. Practice a seam on scraps first, using the allowance specified in the instructions. Press as you go, with an appropriate heat setting, and learn one suitable way to finish raw edges. Woven edges can fray even when the main seam is strong.
After finishing, note what actually slowed you down. Repeatedly measuring narrow hems may justify a seam gauge. Cutting many straight strips may justify a rotary setup. Frequent small repairs might make compact thread snips convenient. A dress form, serger, large cutting table and specialty presser-foot collection can wait until your work shows a clear need. Avoid buying an attachment without checking machine compatibility.
Stop and seek experienced help when a repair affects protective equipment, load-bearing straps or other safety-critical items. For valuable or delicate clothing, a professional alteration may also be the better choice. The goal is not to own a complete sewing department. It is to have a few tools you understand, enough practice to use them confidently and a sensible reason for whatever comes next.
Before buying equipment or booking instruction, verify current prices, included supplies, compatibility and return or cancellation terms.
AI Assistance Used — AI assistance was used in researching and drafting this article. It was reviewed, edited, and fact-checked by Lisa Barber before publication.